Chapter 7 - The Wing
Section 3 - Wing Assembly and Bottom Skin
Preoparing the Wing for Glassing
There are a few details we must take care of before we can glass the wing. All crevasses and crannies need to be filled in with micro and smoothed. We need to prepare the A and G ribs so the glass has a nice radius to ride over, and we need to make some trailing edge flanges.
First, mix up a goodly amount of thick micro and fill all of the gaps between the wing skins and the ribs. Be especially vigilant that the micro does not stick up above the surface of the wing skins. It will be very difficult to sand down later and not sand into the surrounding foam. We have gone to a lot of trouble to get the foam countoured correctly and we don’t want to mess with the wing shape now.
Insure that the aft spar does not stick up above the level of the skin, and if it does \grind it down below the level of the skin, then remove some foam from the edge of the aft spar and fill with micro.
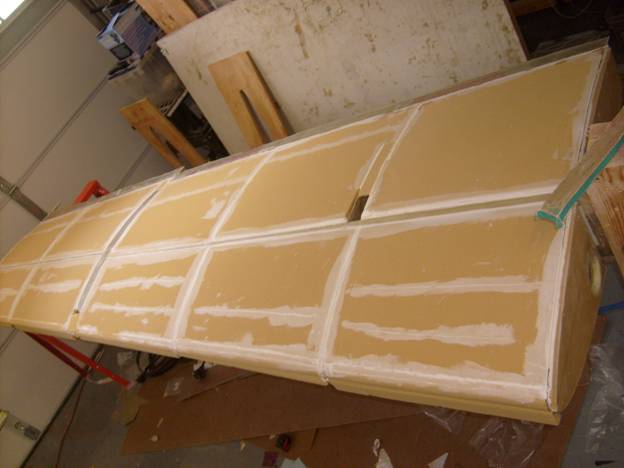
Wing Ready to be Glassed
Notice in the picture above that the A rib has had a nice radius sanded into the outside edge almost the full width of the rib. Prepare both the A and G rib this way. The glass will extend down onto the sides of the A and G rib and we need a smooth radius so the glass does not buckle. Sand the radius into the ribs, then dig out foam and fill with thick micro. Let cure. Then sand to a nice final radius.
Finally, create a flange along the entire length of the trailing edge. The will be easier to create if the wing is flipped and the foam skin is down. This way the curing flange will have gravity holding it in place. Use strips of masonite 3 feet long or so and 6 inches wide. The flange should extend aft at least 2” and extend down onto the aft sapr 1.5 to 2”. Cover the masonite in packing tape and clamp to the last few inches of the wing skin so the flange has the same lines as the wing foam. Use a 1 X 2 board to clamp the masonite strip down to the aft wing skin. If the masonite rides up in the middle you will have a high spot in the flange and the resulting wing skin will reflect this deformity.

Completed flange
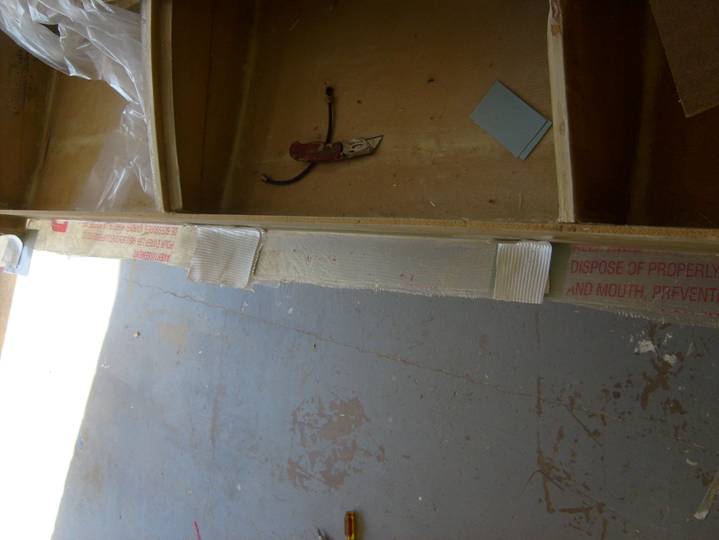
Make the flange continous
You will have gaps in the flange due to the need to clamp the flange strip on both sides. Fill these gaps with squares of glass as shown above.
We are now ready to begin glassing the wing. Flip it back over and inspect your handiwork. Correct any micro sticking above the surface of the foam, but be careful not to sand into the foam skin.Fill the gap between the trailing edge and the trailing edge flange with micro and sand smooth.
Complete.