Chapter 4 - Finishing the Tail
p>Section 1 - Bonding the Tail to the Fuselage
Installing the Horizontal Stabilizer.
We are making good progress toward installing thehorizontal Stab, we just need to align the horizontal stab one last time and bond it into place. This will be accomplished by the folloing steps:
- Trial fit horizontal stab and level complete assembly
- Add fiberglass tape to horizontal stab
- Flox fuslease side of joing
- Assemble and let cure
- Dress resulting flange
- Bond horizontal stab
- Add reinforcing fiberglass
Step 1- Level the Fuselage – Level the fuselage as you did before. Return the fuselage to its previous position and insure it is perfectly level.
Release Tape on Horizontal Stab
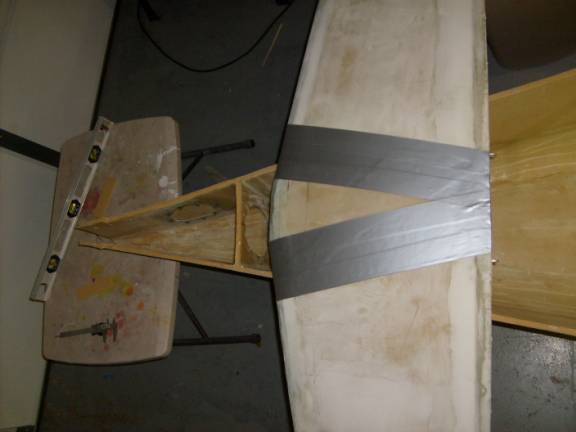
Step 2: With the horizontal stabilizer on the fuselage, mark two lines on the bottom about 2 inches away from the fuselage sides. Then flip the horizontal stab over and apply a layer of duct tape so that the horizontal tail surface is covered from at least 2 inches away from the fuselage sides on both the inside and the outside. The result should look like the above photo.
Step 3: Align horizontal stabilizer. This is the most critical step. You will need to position the horizontal stab in its final resting place. The cut out in the rear of the horizontal trailing edge where the elevator bellcrank extends should be exatly centered between the fuselage sides. The trailing edge should be aligned with the notch in the fuselage side for it. The ribs inside the horizontal stab can be seen through the skin and should be centered on the fuselage. Now measure from the outboard spar to a point on the firewall and insure that this distance is equal to both wing tips.
The cutout on the fuselage side will correctly establish the incidence angle of the horizontal stab. This needs to be confirmed by extending an imaginary line forward through the center chord line of the horizontal stab and establish where it intersects the firewall. This point should be about four inches from the top of the firewall.
Finally insure that the horizontal stab is level side to side.
It is important that once you establish the proper position of the stab you can repeatably return the stab to this position and secure it in this position. Once satisfied you can achieve this it is time to fabricate the mounting flanges.
Step 4: Draw a line on the top of the stab down its absolute center. Take your time in creating this line as it will be used to reference the final location of the horizontal stab to as well as establish the center line for the installation of the vertical stab.
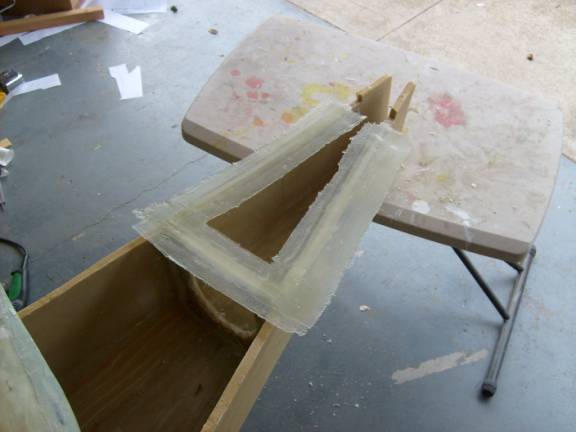
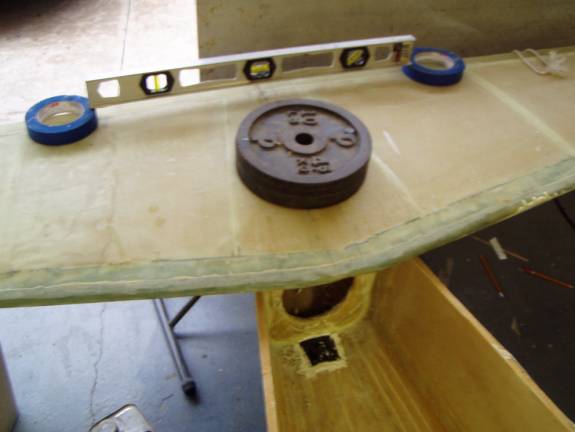
Step 5: Flip the horizontal stab upside down and apply a two layer laminate using 3 inch wide BID centered on the fuselage sides and the rear bulkhead. Your laminate should look like the following photo.
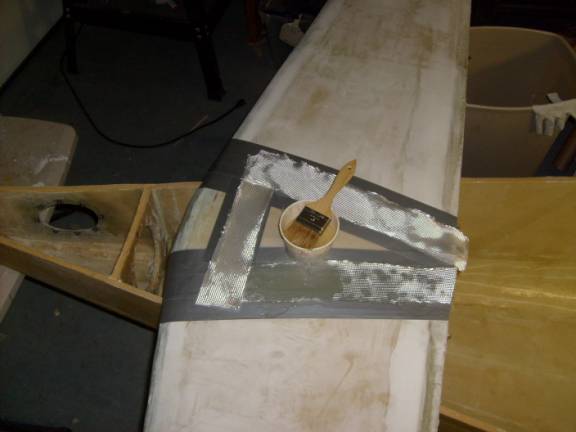
Apply Flange BID to Bottom of Horizontal Stab
Step 6: Mix up a batch of thick epoxy and flox. Pack this mixture into the slots along the top of the fuselage and rear bulkhead created earlier by removing foam. This should be along the entire area where the horizontal flange will attach to the sides and rear bulkhead. The mixture should be piled into the slots extending and eight to a quarter of an inch above the top edge.
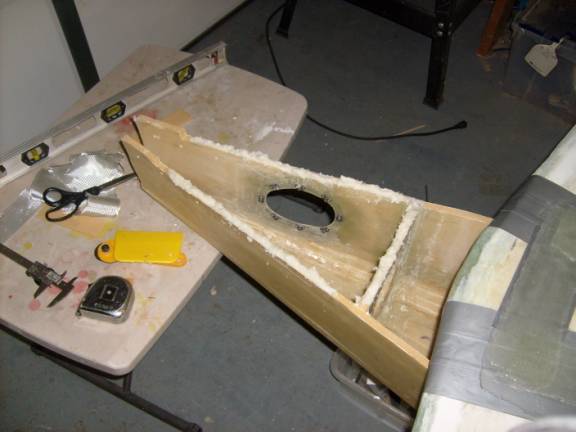
Flox packed into slots
Step 7: Re install the horizontal stab into its final position and check, recheck and then triple check its proper position. Use your finger to wipe away the excess flox that oozed from the joint and create a nice radius. Once you are happy with its location leave it be while it cures.
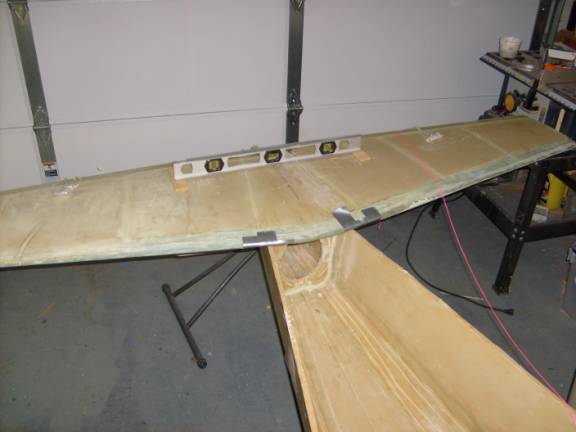
Horizontal Stab’s Final Resting Place
Step 8: Once the flanges have cured, wait at least 24 hours, drill two holes on each side through the flanges and into the horizontal stab to establish reference locators. These will be used later to reposition the horizontal stab.
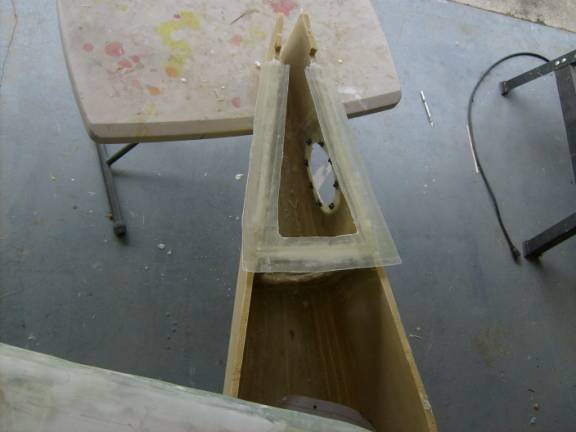
Resulting Flange
Step 9: Remove the horizontal stab from the flanges and trim the flange to about 1.5” on each side. Use rough sandpaper to smooth and radius the flox joint. Apply a two layer laminate on the inside of the fuselage running along the bottom of the flange down the side of the fuselage. Cover the entire flange and have the layup run about 1.5” down the fuselage sides
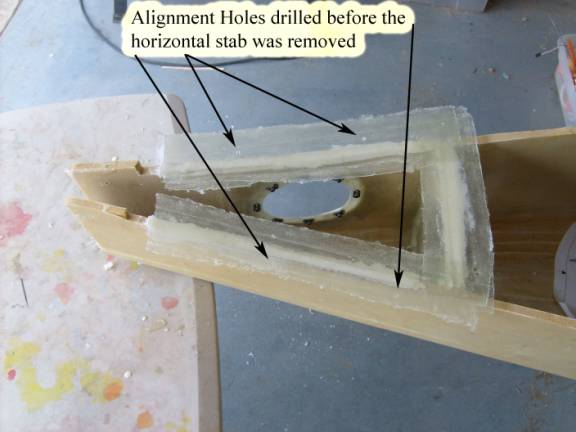
Alignment Holes
Step 10: When this inside layup cures, trim the flange and roughen it with coarse sandpaper. Locate four screws, reposition the horizontal stab and secure it with them through the holes you created earlier. Assure yourself you can properly align the horizontal stab and secure it repeatable. Once you have done this you are ready to permanently attach the stab.
Final flange
Step 11: Give the flange surfaced and the bottom surface of the horizontal stab a last foing over with rought sandpaper and a cleaning with acetone. Position your mounting screws where you can each them, have your levels and measuring tapes handy so you can confirm the final mounting location of the stab.
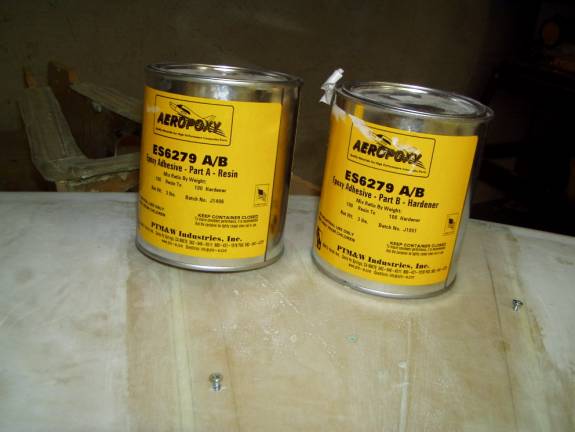 Structural Epoxy
Step 12: Mix up a batch of structural epoxy, not the normal laminating epoxy. Mix this very well then smear a thin layer on both the horizontal stabilizer and the flange surface.
Final Bonding
Step13: Use the four screws to securely attach the stab to the flanges and run through your last measurements to assure yourself all is aligned properly for this last cure. The epoxy will ooze from the joint, carefully wipe this away without disrupting the position of the stab. Let the epoxy cure.
Step 14: Once the stab is bonded in place, flip the fuselage over and grind down the heads of the mounting screws. Apply a two layer laminate over the outside joint extending an inch beyond the flange onto the horizontal stab and an inch and a half onto the top of the fuselage side.
Step 15: Clean the inside of the rear section of the fuselage and apply a four layer laminate, 2.5 inches wide along the bottom trailing edge of the stabilizer onto the insides of the fuselage. Work from the back of the fuselage and through the access panel in the side to smooth this layup.
Congratulations! This is a major milestone. The fuselage no longer looks like a boat, but like an airplane taking shape. We are on a roll, lets bond on the vertical stab…