Chapter 4 - Finishing the Tail
p>Section 1 - Bonding the Tail to the Fuselage
Rear Access Panel
Once the Horizontal Tail is installed, the area at the very back of the fuselage is impossible to access. This rear access panel will allow us to rig the elevator and rudder control cables as well as perform maintenance on them in the future.
Step 1: Print out the drawing of the rear access panel. This is helpful as it shows both the size of the panel and the placement of the mounting holes. Rear Access Panel
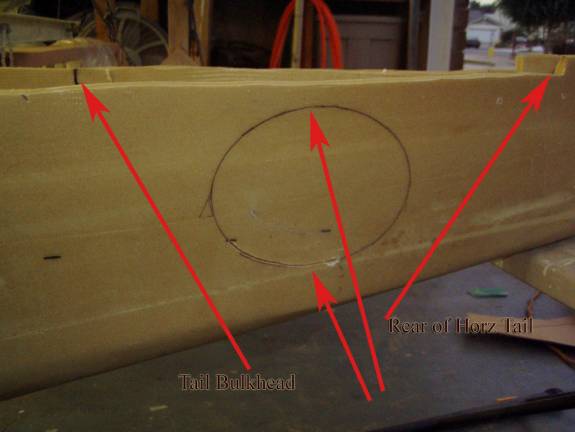
Proper Position of Rear Access Panel
Step 2: The rear access panel is on the pilot side of the fuselage under
the horizontal stabilizer as shown above. It is positioned 1/3
of the way between the tail bulkhead and the rear of the horizontal tail. The
bottom of the panel lines up with the joint between the fuselage side
and the fuselage bottom and the top of the panel is about an inch from
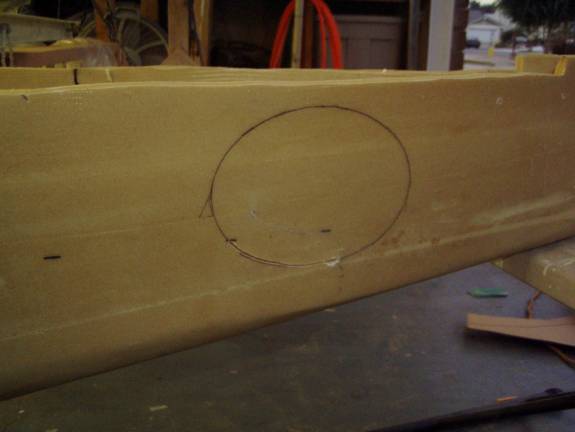
the bottom of the horizontal stab. Once you have positioned your
drawing of the panel, use a sharpie to trace its outline onto the fuselage
side.
Scribe a hole to allow a saber saw blade
Step 3: Use a razor knife to cut a slot that will allow a saber saw
blade to begin cutting out the panel.
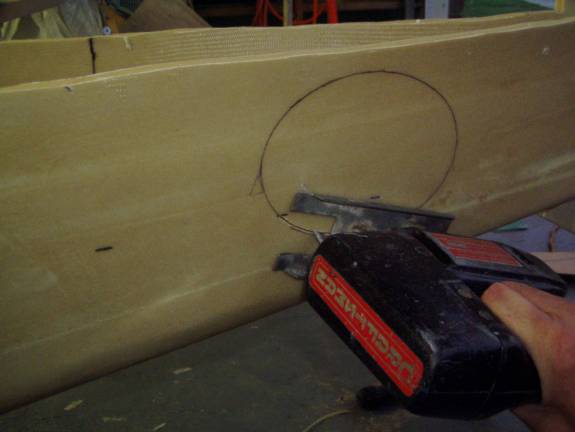
Saber Saw in Action
Step 4: Use your saber saw to cut the panel out and remove it from the fuselage side.
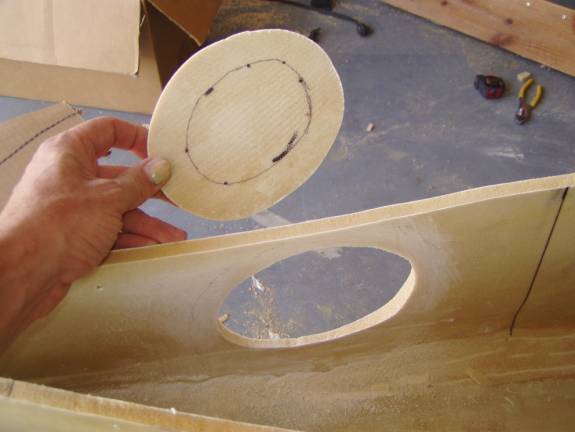
Prep the surfaces
Step 5: Prep the surface for fiberglass. Use a coarse grit
sandpaper to roughen up the fiberglass on the inside fuselage side, clean
with acetone. Use a pencil or sharpie to trace a line an inch and
a half around the outside of the hole in the fuselage. Trace another
line the same distance inside the panel edge as shown. These lines
will act as a reference when you layup the fiberglass flange to support
the finished panel.
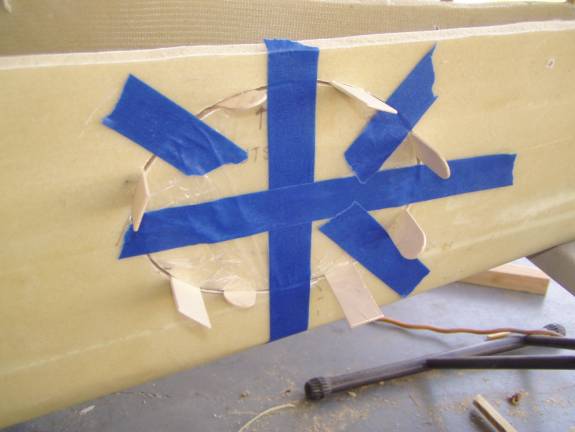
Prep for Flange Fabrication
Step 7: Wrap the inside of the panel with a plastic release film. Reinstall the panel into its original position using tape and stir sticks to properly space and orient it.
Step 8: Cut strips of 3” wide BID. It is easier to layup around a curve like the panel flange by using individual pieces only about 6 inches long. Create a flange all round the inside of the panel, overlapping the fiberglass 50/50 over the gap. Make a 6 layer laminate. It is easier if you wet out 3 layers of glass on a piece of plastic work sheet, then transfer them to the fuselage inside. Make another 3-layer layup (6 inces long, 3 inches wide) and over lap it with the previous layup by about an inch and work your way around the panel gap two times. Let Cure.
Step 9: After the fiberglass has cured, remove the panel and trim the resulting flange to about one inch in width. Sand the inside and the flange edge to a nice finish. Your hand is going to be working through this hole.
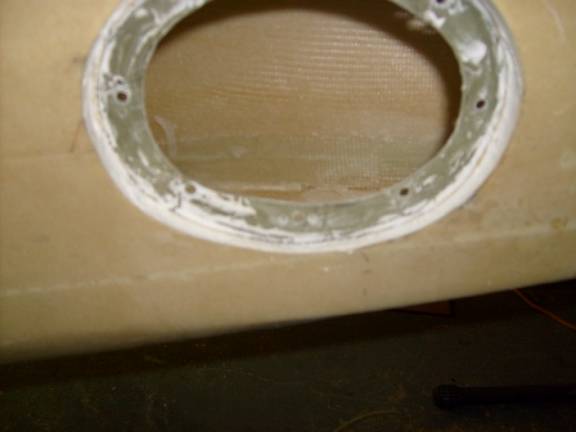
Prepare Hole
Step 10: Remove a small amount of foam all the way around the opening in the fuselage between the outer fiberglass skin and the flange. Mix up a batch of thick micro and fill this edge to create a nice edge for the hole.
Step 11: Replace the panel and again use stirring sticks as spacers. Use the panel drawing from before as a reference and drill the 8 mounting holes through the panel and the flange.
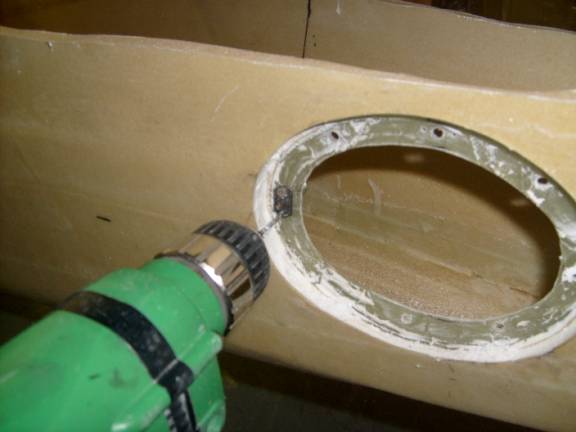
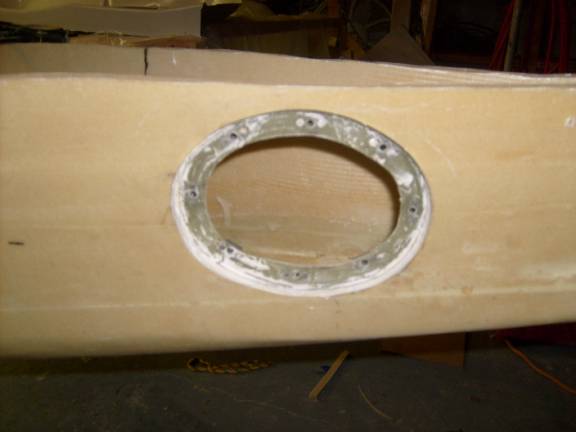
Drilling Nut plate Rivet Mounting Holes
Step 12: Install 8 Nut plates on the inside of the flange. The easiest way to do this is to use a mounting screw to hold the nut plate in position on the outside as shown in the photo. Then drill one rivet hole. Insert a rivet into the hole (do not install the rivet) to hold the nut plate in position and drill the second hole. A cleco can also be used from the inside to hold the nut plate in the proper position. Counter-sink the outside of the rivet holes and then secure the nut plate to the inside of the flange.
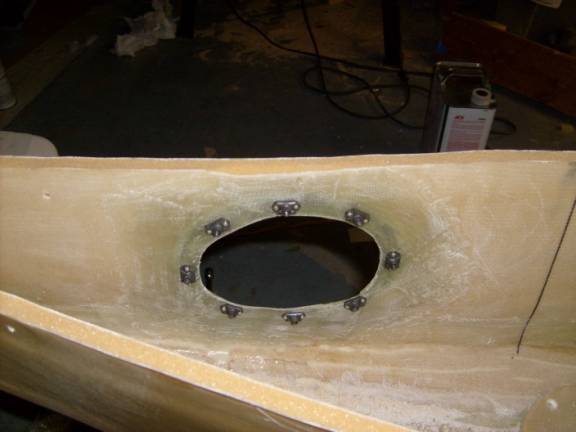
Installed Nut Plates
Step 13: Install the nut plates on the inside of the flange as shown in the above photo with flush mount rivets.
Finished Panel Opening
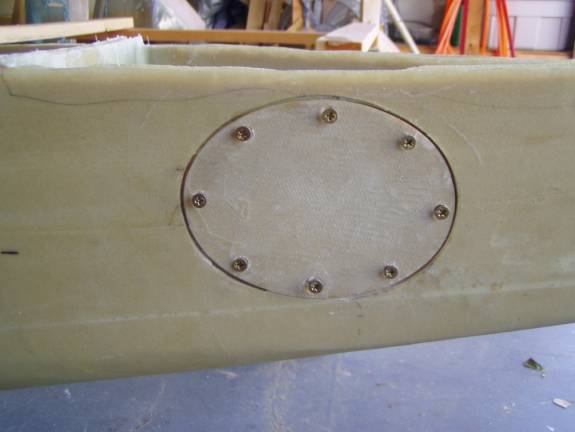
Panel Installed
Step 14: At this point you may finish the body work of the panel and the hole. Refer to the section describing the Access panels in the wing as this section gives a very detailed process of finioshing the access panel doors. Finish the edge of the panel itself and the hole in the fuselage. Finish the counter sunk screw holes in the panel. You will probably end up doing a bit more finishing when you are ready to paint, but will be thankful of the effort you put in now.