Chapter 8 - Finish the Wing
Section 2 - Flap Assembly
A flap spar is created from 1/2" last-a-foam and two layer BID on each side. It is XXX inches long, YYY tall at one end and ZZ tall at the other end. It is to extend a couple inches at each edge. When installed, the spar should be lower than the flap ribs slightly. We want the flap ribs to define the shape of the flap, not the spar.
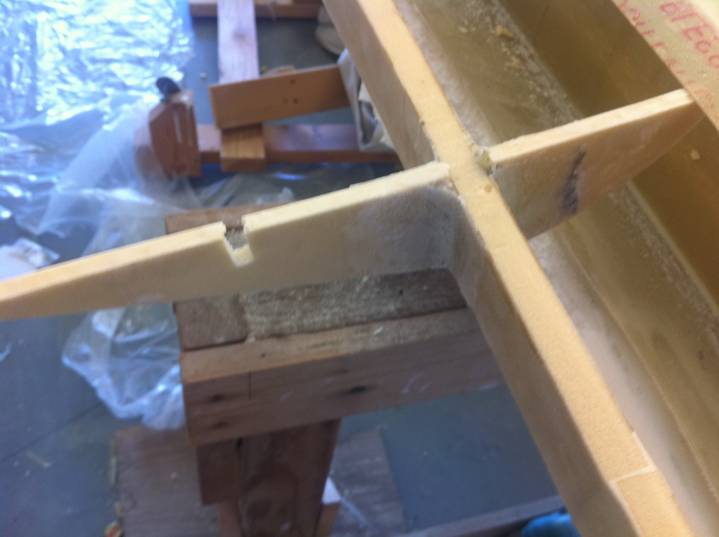
The wing should be flat upside down. The three flap rib/flap hinge assemblies should be bolted to the wing flap hinges. The flap spar is then notched to fit each of the ribs. It is important that the spar fits the ribs very loosely, We do not want the spar to deflect the proper position of the flap ribs in any way. The height of the flap spar should be below the height of the flap ribs on both sides of the flap, all the way down its length.
The spar is thn micro-ed into place. Note that the following pictures are taken with the flap off the wing. this was done for better lighting, but all flap assembly should be dome with the flap attached to the wing.
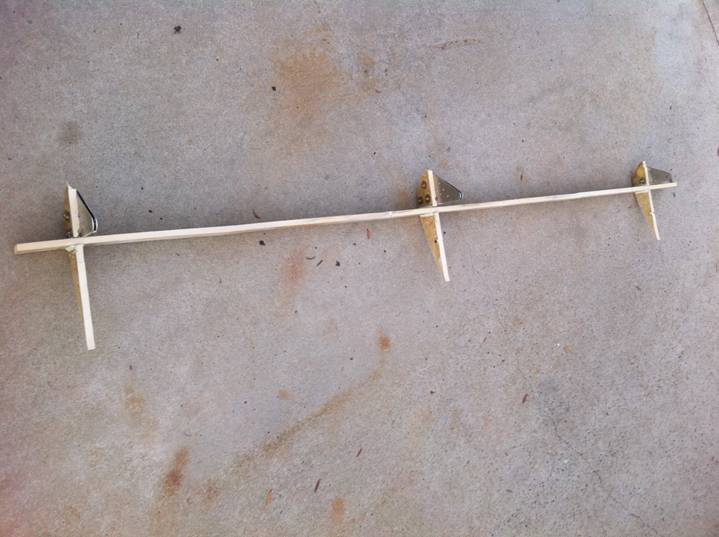
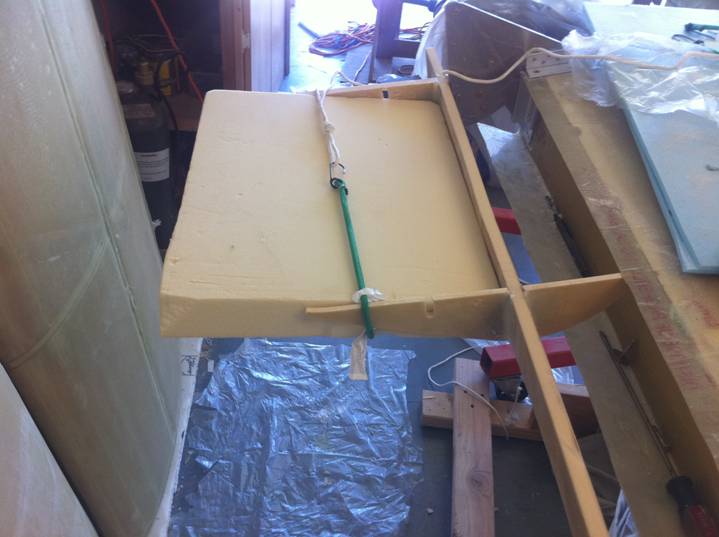
Flap assembly with 1/2" ribs micro-ed into place.
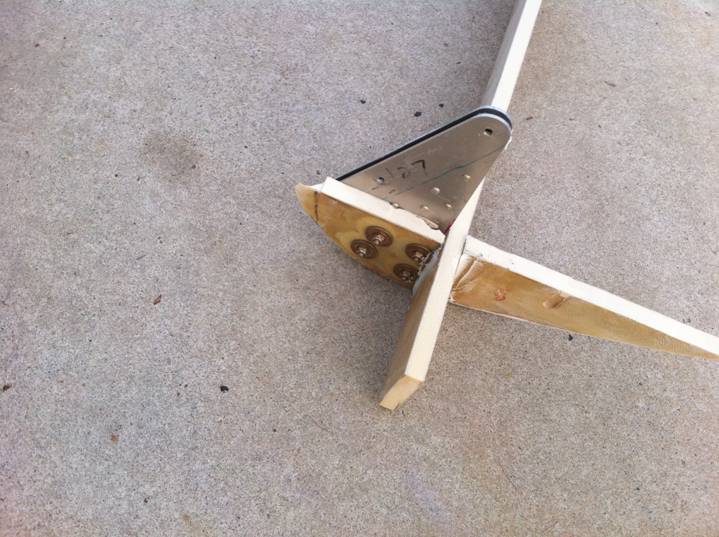
Close up of B Flap Rib
The 2 1/4" ribs are then installed exactly half way between the 1/2" ribs. Make sure the correct rib goes in the correct location. Each of the ribs is named to correspond with its associated wing rib. The 1/4" ribs are located by clamping a light straight edge to the two 1/2" ribs on each side. They are positioned straight back, not 90 degress to the flap spar (same orientation front to back as the 1/2" ribs). When sighting down the end of the rib the trailing edge of the flap should line up with the 1/2" ribs. When properly located, micro the two 1/4" ribs into place. The remaining 1/2" A rib and 1/4" F rib are instaled later.

Spar notched ready for 1/4" rib
Note how spar is lower than rib

Flap with all 5 ribs located - Ready for foam
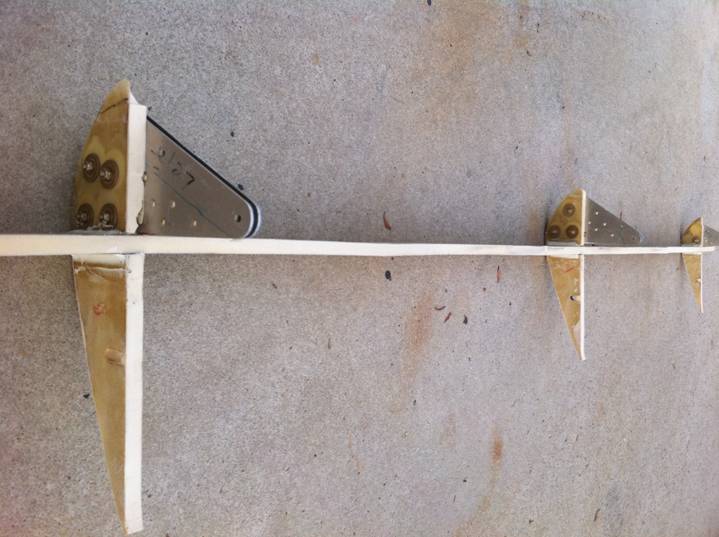
With the five ribs microed into place, apply a two layer BID reinforcement over each rib to spar joint extending an inch onto both the spar and the rib. The three locations where a hinge is attached to a rib do not get this reinforcement. It is important from this point forward to respect the rib surface where the hinge is mounted. Later, if micro or a layer of fiberglass is put down on this surface with the hinge removed, when the hinge is later bolted intoplace, the hinges will not line up.
Use 2 layer BID at each flap to spar joint.
Once all the 5 ribs are structurally attached to the flap spar, it is time to lay in foam. Note that the foam is done in four three. First the bottom of the flap rear of the spar is foamed, sanded to shape and sealed. (Sealing is done with a runny mixture of epoxy and micro.) Then the flap is removed from the wing, the hinges are removed and the bottom of the flap forward of the spar is foamed, sanded to shape and sealed. The bottom of the wing is glassed. the hinges are reinstalled, and the top of the flap is foamed and sealed, then glassed.
So for now we want to bond in foam so the bottom of the flap can be sanded to shape. Note that the following pictures show the top of the flap being foamed first and this is not correct. In the photo below the foam block should rise above the bottom of the flap ribs (since the wing is upside down).
Foam block being bonded to ribs and spar (note block should be higher, above ribs)
I used two part polyurethane foam to bond in the foam blocks, this works very well, but extreme care must be taken to insure the not allow the expanding foam to mis align the flap ribs with respect to the wing. I juggle the foam block as the foam is curing to relive any pressure. Note in the photo below, the top of the flap was foamed first. this is not correct, we want to foam the bottom first. If a large enough block of foam is available (I only had 2" thiuck foam blocks) the whole of the rear flap can be foamed in.
Stage 1 foaming complete (except should be bottom)
Once the bottom of the flap is foamed aft of the spar it is sanded to shape using a long sanding block that extends at least the distance between two ribs. Take your time and shape the bottom of the flap foam using the ribs as a guide. No foam should extend above the shape defined by the ribs. Finally seal the foam with a runny mixture of epoxy and micro. This makes the foam more durable while we handle the flap preparing for glassing the bottom.