Chapter 8 - Mounting the Wing to the Fuselage
Section 1 - Wing to Fuselage
Wing to fuselage - This section is under construction
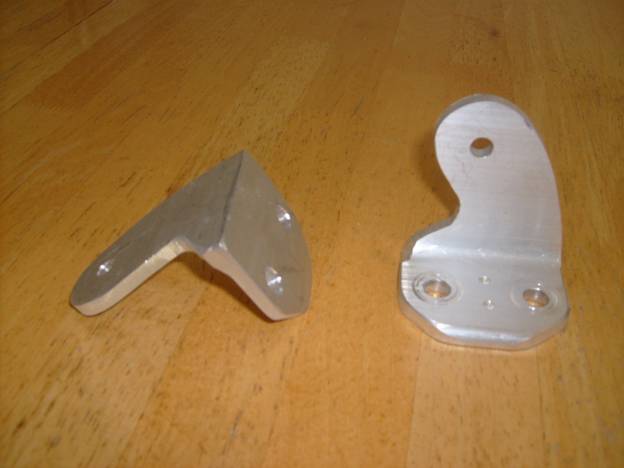
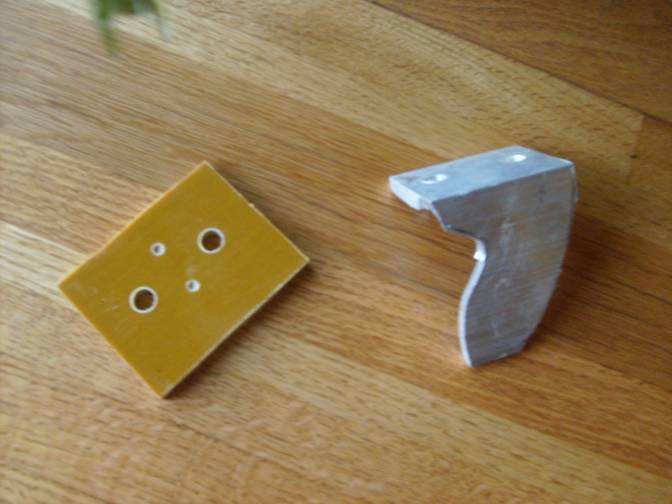
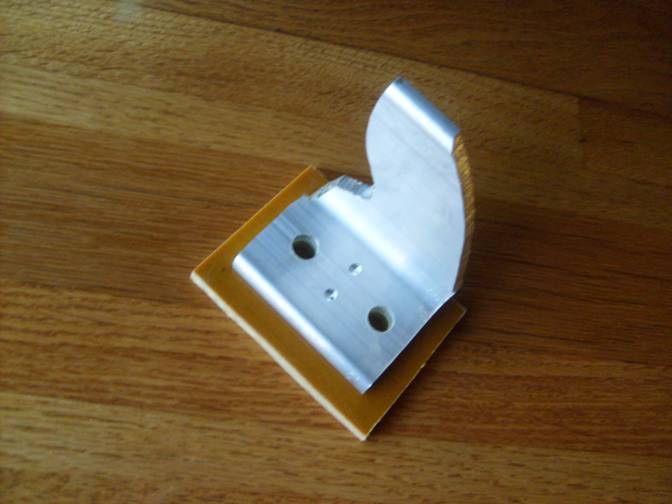
Fabricate two phenolic spacers and two aluminum angle brackets per the following drawings:
- Aft Spar Mount Fuselage Phenolic Spacer
- Aft Spar/Fuselage Attach Bracket
Match drill the holes in the phenolic to the holes in the bracket and mark all parts as they are not symmetrical, there is a right and left of each, and the spacer has an inside and an outside. Do not drill the final hole in the bracket as this is match drilled to the aft spar plate after the bracket has been mounted to the fuselage.
Phenolic Spacer and Roughed out Bracket
Match Drill the phenolic to the spacer
If the wing is not already bolted to the fuselage, do so. Space the spar evenly between the forward and rear spar support plates. Insure the wing is not twisted using the top skin lines drawn on the fuselage side as shown below.
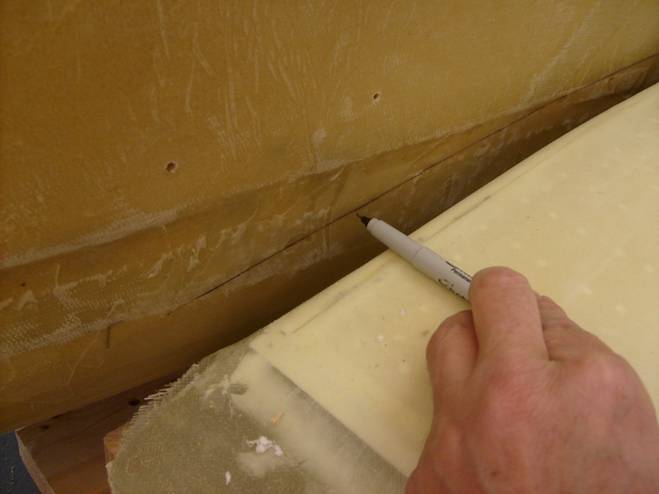
Insure the trailing wing edge is properly positioned with respect to the fuselage
Using an 1/8” aluminum spacer between the aft spar attach bracket and the aft spar attach plate, clamp the two together as shown below.
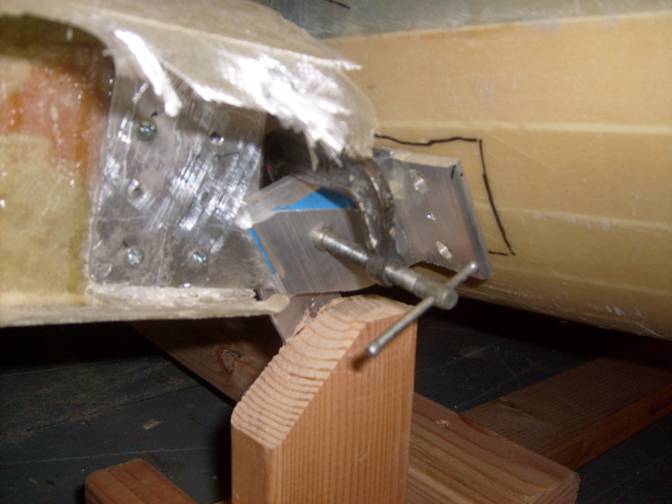
Bracket clamped in place
Position the bracket so that the forward edge of the bracket is touching the fuselage side. It should be at about a 45 degree angle to the vertical. Use a sharpie to project the outline of the bracket onto the fuselage side.
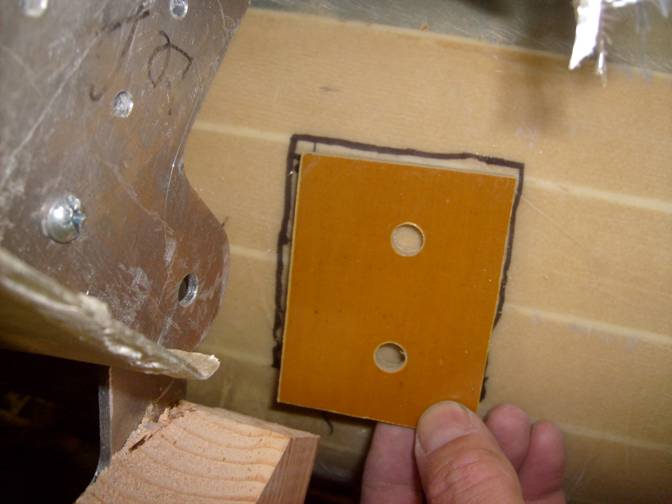
Center Phenolic on fuselage side and mark position
Center the phenolic on the bracket and mark its outline on the fuselage side as well.
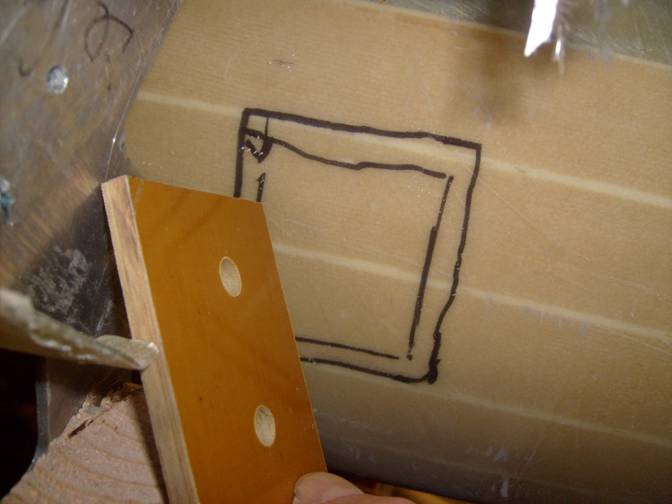
Phenolic Centered
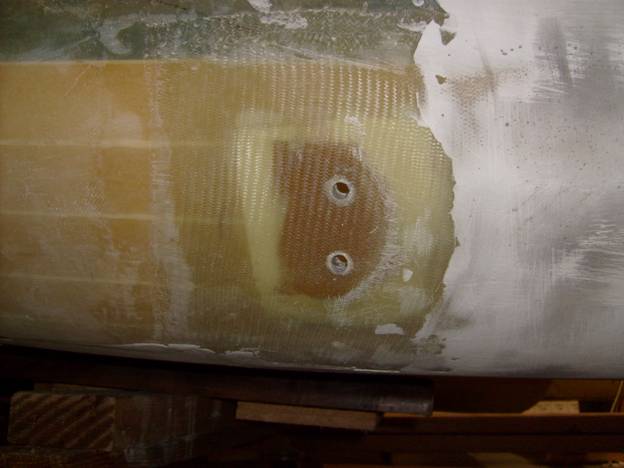
Now cut all the way through the fuselage on the smaller inside rectangle, and trim the outside fuselage skin to the large rectangle. Dig a little of the foam out for micro to be added later.
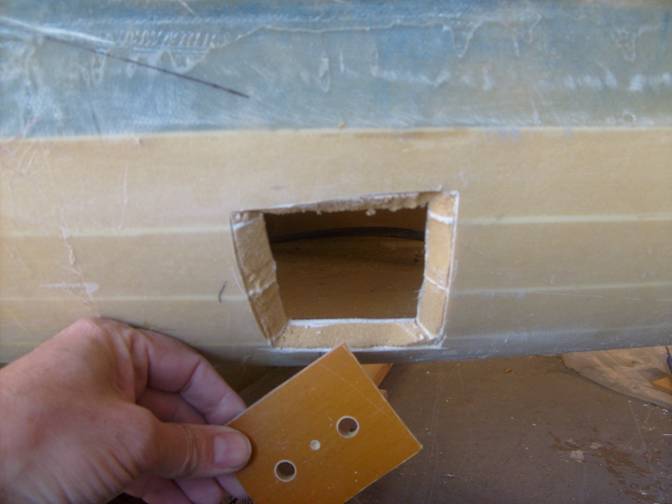
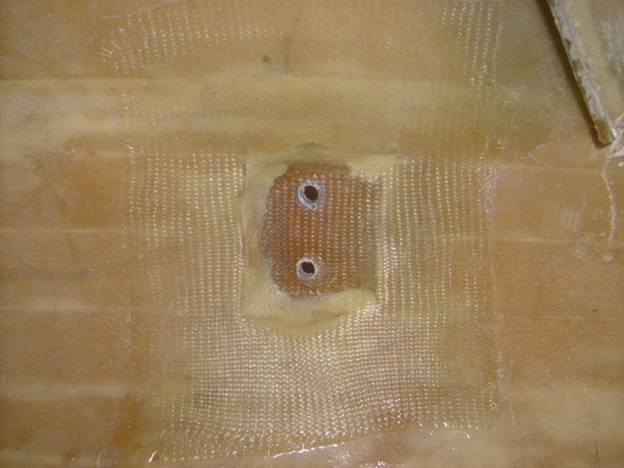
Hole Prepped to accept phenolic spacer
Hole Prepped to accept phenolic spacer
Once the hole is prepped for the phenolic spacer, bolt the spacer to the bracket and once again clamp the bracket to the aft spar place with the 1/8” spacer between them. Position the phenolic in the hole to recreate the position of the bracket used to mark the location of the bracket against the fuselage.
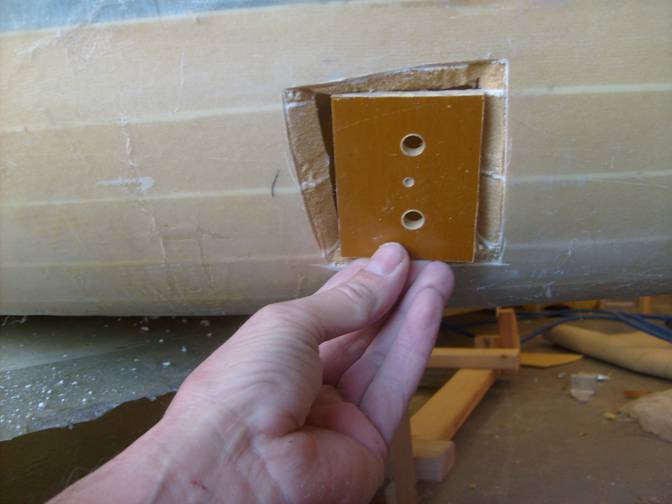
Bolt the phenolic to the bracket and position the assembly so the phenolic fits in the hole and the bracket aligns necly with the bracket on the trailing spar of the wing.
Use a thick micro to bond the phenolic into place. Don’t worry about perfection at this point, just bond the phonelic in place so it is secure.
Phenolic Microed into place
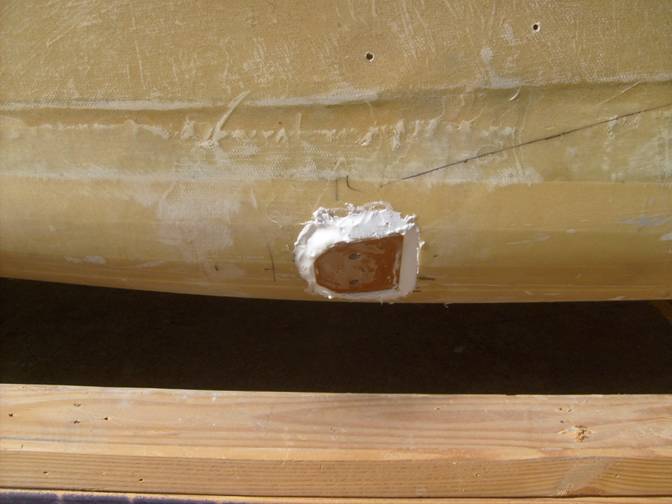
Once the micro has cured, remove the bracket and again micro the entire phenolic in place. Insure you have a flat surface on the outside of the phenolic for the bracket to mount to. That is, don’t get micro over the mounting surface of the phenolic piece.
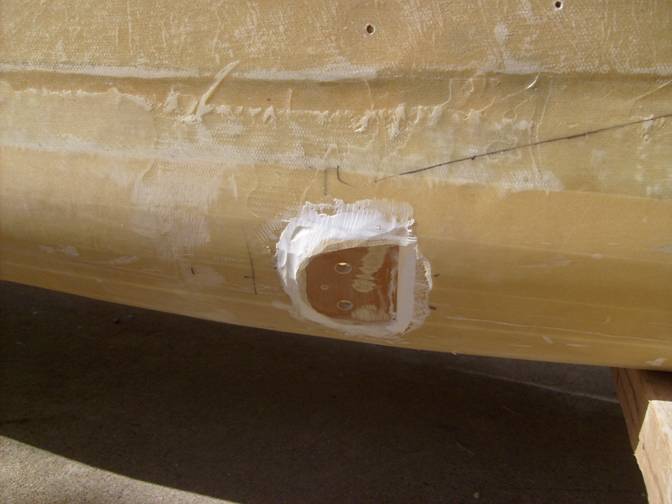
Micro Dressed, ready for Fiberglass
Prepare the surfaceof the fuselage by lightly sanding and cleaning with acetone. Use 6 layers of BID to cover the phenolic, the first two should extend two inches beyond the micro boundary, the second two should extend three and one half inches and the last two should extend 5 inches.
Repeat this layup schedule on the inside of the fuselage, but be sure to insure you have a flat surface for two washers to mount under bolts holding the bracket in place.

Ready for Fiberglass